Thursday, August 29, 2013

Battery life

TIPS TO HELP EXTEND BATTERY LIFE OF YOUR MOBILE PHONE

I remember when I first got a mobile phone a year back. The salesman warned me that my smartphone would have a much shorter battery life. I soon realized that he wasn't exaggerating at all.
Battery HD Tips To Help Extend Battery Life Of Your Mobile Phone
I could often go several days without charging my old cell phone, but I was lucky to get more than a few hours out of my Android before I had to charge it. Fortunately, there are a number of steps that you can take to extend your battery life.

FIND OUT WHICH APPLICATIONS USE THE MOST POWER

Most phones let you check which applications are running and how much power they are using. You can find these by going to your settings and navigating to the Battery Use panel.
You may be surprised by how much power some of your applications are using. You want to consider disabling some applications or removing them completely if they aren’t necessary.

CHANGE YOUR SCREEN SETTINGS

Your screen sucks a lot of power. One research paper found that your screen will be using about 45-50% of your phone’s power if you run it at full brightness. There are a couple of screen settings that you can change to extend your battery life.
Make sure that your screen isn’t running at full brightness. You can probably use your phone effectively even if you turn the brightness down to 70%. Newer mobile phones also have an auto brightness setting that adjusts to the surrounding light. This is probably the most efficient thing that you can do.
It is also a good idea to change the screen timeout settings (the amount of time that elapses before the screen turns off if the phone isn’t in use). Most people set their timeout settings to two to five minutes. You may want to set them to the minimum allowed on your device (generally 15 seconds for an Android and a minute for an iPhone).

DON’T FULLY CHARGE YOUR BATTERY

Most people charge their batteries to full power each night. One expert says that your battery will operate much less efficiently if you do this regularly. This is especially true if you charge it to capacity and then use it until the battery is dead (which over two thirds of smart phone users do fairly regularly).
Your battery will operate much more efficiently if you charge to 50%. You shouldn’t charge your battery completely more than once a month.

CHOOSE NOTIFICATION SETTINGS WISELY

Your notification settings can be draining your battery much more than you expect. Many people have their phone set to notify them every time anything happens. Do you really need to be informed every time someone sends you a tweet or posts on your Facebook Wall? I find many of these settings to be very distracting as well as an unnecessary use of power.
You may also want to change the way you are notified. Most people always keep their phone on vibrate. This may be important if you are at work or another setting where it can cause a disruption. However, you may want to change your settings to ringtone when you are at home.

USE YOUR PHONE CONSERVATIVELY

There are a variety of things you can do to make sure that your phone runs more efficiently. However, you will use a lot of power if you are constantly using your phone to check Facebook, send emails or run high powered apps. You will need to be careful about how often you use your smartphone. You may not be able to use some of these features if your battery is low and you need to make a call shortly or use your GPS to get back home.

and last and most important thing always make sure whenever you don't need your phone data always make sure you have it switched Off.

settings>mobile data>off.

BB Z10


How to copy files to and from a BlackBerry 10 smartphone using Wi-Fi Sharing


So i recently got hold of my friend Vijay's BB Z10 and thought about trying this and it worked very smoothly,so the next time there is no need to get my USB Cable.


The next time you need to copy files to or from your BlackBerry 10 smartphone, instead of grabbing a USB cable you can use Wi-Fi sharing instead. Once you have set up your smartphone for Wi-Fi access you’ll be able to transfer files between a Windows or Mac OS computer and your BlackBerry 10 device.


This is just one of many useful applications for this feature so without further ado, here’s how to do it!
Step 1 – Turn on Wi-Fi Access
Complete the following steps to turn on Wi-Fi access as well as set up a password to restrict access to your smartphone over Wi-Fi.
  1. While viewing the home screen, swipe down from the top of the screen
  2. Tap Settings followed by Storage and Access
  3. Set the Access using Wi-Fi switch to On
  4. When prompted, enter a storage access password
  5. Tap Identification on Network and make note of the Username
BB10-WiFiShare-A     BB10-WiFiShare-B
Tip: If you haven’t already, give your BlackBerry 10 smartphone a nickname so it’s easy to identify on your network. To do this, tap Settings on your home screen followed by About. Within this screen, set your desired nickname in the Device Name field.
Step 2 – Identifying your smartphone’s IP address
Once you have enabled Wi-Fi access to your smartphone, the next step is to identify your smartphone’s IP address so you can connect to it using your computer.
  1. While viewing the home screen, swipe down from the top of the screen
  2. Tap Settings followed by About
  3. Tap the Category bar and select Network
  4. Under Wi-Fi, record your IPv4 address
    • When recording your IP address, you only need to record the first 4 quadrants, i.e. 12.34.56.78. You do not need to record the trailing number, you only need the first four quadrants (the bolded numbers), i.e. 12.34.56.78/22
Step 3 – Accessing your smartphone over Wi-Fi using a PC or Mac OS
Since we have enabled Wi-Fi access to your smartphone and obtained the IP address, all that’s left to do is connect your computer to your smartphone.
How to access a BlackBerry 10 smartphone over Wi-Fi using Microsoft Windows
    1. On your Microsoft Windows computer, select Start followed by Run
    2. If you are using Microsoft Windows Vista, Windows 7 or Windows 8, you may need to search for the Run option first. If you cannot find the Run option, open My Computer on your computer’s desktop and type the address mentioned in the next step in the My Computer address bar instead.
    3. Enter the following “\\1.1.1.1\” and replace 1.1.1.1 with the IP address you identified earlier in step 2
BB10-WiFiShare-C
  1. When prompted, enter BlackBerry for the username and type the Wi-Fi access password you set earlier in step 1
  2. Your smartphone file system will appear on your desktop. Select Media to access your smartphone memory or select Removable_SDCARD to access the MicroSD card
How to access a BlackBerry 10 smartphone over Wi-Fi using Mac OS X
    1. On your Mac OS X computer, open Finder and select Go followed by Connect To Server
    2. Enter the following “smb://1.1.1.1” and replace 1.1.1.1 with the IP address you identified earlier
BB10-WiFiShare-D
    1. When prompted, enter BlackBerry for the username and type the Wi-Fi access password you set earlier in step 1
    2. If prompted to select which volumes you want to mount, select Media and click Ok
BB10-WiFiShare-E
  1. Your smartphone file system will appear on your desktop, select Media to access your smartphone memory or select Removable_SDCARD to access the MicroSD card

Thursday, August 22, 2013

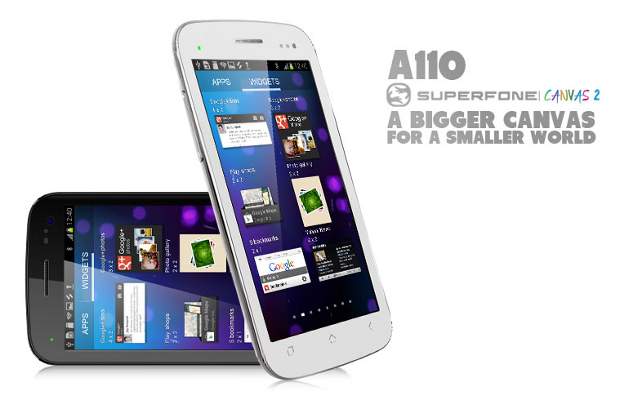
Mmx canvas 2 engineer mode

Micromax Canvas 2 Engineering Mode (A110) & Improve audio/touch & Tv Output


Hey Guys,

Recently I also Purchased Micromax Canvas 2, so thought of going through in deep, the first thing i noticed in the mobile was that its response of touch is less as compared to its other sets, but that can be due to its big screen & the Second Problem was of less speaker volume.

Here i will Provide You Solution to both of these problems :
The Solution to your touchscreen smoothness is a simple one just upgrade your mobile version to Jelly Bean.
Official Mod is now available on micromax ftp server.
You can search the net for micromax ftp server but you will have to login with username and password which is also easily available on net.
Just search for Micromax site username and password & u will get it.

Why Jelly bean : The JellyBean Version improves the lag on screen & it makes your touch more smooth at least you can feel this way, it is because of Project Butter,it is an integral part of JellyBean Version which you cannot see but it does modification to your existing version to give you a lag free touch experience.

Now For the Voice :
For this you will need to use the Engineering Mode
NOTE: Use it one your own risk/ i have tested all these settings and they work good for me but if you are not certain on how to use it or you don't have any techie knowledge prefer don't use it.

Audio Settings :
  1. To Go to engineering mode go to your dial pad & type "*#*#3646633#*#*" 
  2.  Next.
  3. Now If you have upgraded your phone then scroll on to right or if not then scroll down to hardware Testing Tab.
  4. In here Just Select audio then go to Loudspeaker Mode
  5. Now scroll down to Max Vol 0-160: By Default it is 128 & You can change it to 160 but at 150 and above i noticed it produces more noise then voice. When selected your preferred settings Click on set.
TV Output :  *#*#3646633#*#*
  1. Now in Hardware testing tab only you can also check your touchscreen Response their are settings like Handwriting recognition & Multitouch, just don't go in settings.
  2. Now in the hardware Testing Tab only you will find Tv Out and you can select tv -out Enable/Disable tick to enable it and then use otg cable and then usb to hdmi cable to view tv.
Wifi Performance Improvement:

  1. In Engineering Mode Only go to the Connectivity Tab :
  2. Now Select Wifi
  3. Next go to the Tx in this if you change Tx power Dbm then you will be able to improve your Wifi Performance Also.
  4. I was able to change it after rooting and using a software Wifi Fixer or analyzer.
Hope All this will help you in some way.

Android secret codes

                       ANDROID SECRET CODES


*#*#4636#*#*
This code can be used to get some interesting information about your phone and battery. It shows following 5 menus on screen:
  • Phone information
  • Battery information
  • Battery history
  • Usage statistics
  • Wifi information
Menus might differ for different mobile phones. 

*#*#7780#*#*
This code can be used for a factory data reset. It'll remove following things:
  • Google account settings stored in your phone
  • System and application data and settings
  • Downloaded applications
It'll NOT remove:
  • Current system software and bundled applications
  • SD card files e.g. photos, music files, etc.
PS: Once you give this code, you get a prompt screen asking you to click on "Reset phone" button. So you get a chance to cancel your operation.
*2767*3855#
Think before you give this code. This code is used for factory format. It'll remove all files and settings including the internal memory storage. It'll also reinstall the phone firmware.
PS: Once you give this code, there is no way to cancel the operation unless you remove the battery from the phone. So think twice before giving this code.
*#*#34971539#*#*
This code is used to get information about phone camera. It shows following 4 menus:
  • Update camera firmware in image (Don't try this option)
  • Update camera firmware in SD card
  • Get camera firmware version
  • Get firmware update count
WARNING: Never use the first option otherwise your phone camera will stop working and you'll need to take your phone to service center to reinstall camera firmware.
*#*#7594#*#*
This one is my favorite one. This code can be used to change the "End Call / Power" button action in your phone. Be default, if you long press the button, it shows a screen asking you to select any option from Silent mode, Airplane mode and Power off.
You can change this action using this code. You can enable direct power off on this button so you don't need to waste your time in selecting the option.
*#*#273283*255*663282*#*#*
This code opens a File copy screen where you can backup your media files e.g. Images, Sound, Video and Voice memo.
*#*#197328640#*#*
This code can be used to enter into Service mode. You can run various tests and change settings in the service mode.
WLAN, GPS and Bluetooth Test Codes:
*#*#232339#*#* OR *#*#526#*#* OR *#*#528#*#* - WLAN test (Use "Menu" button to start various tests)
*#*#232338#*#* - Shows WiFi MAC address
*#*#1472365#*#* - GPS test
*#*#1575#*#* - Another GPS test
*#*#232331#*#* - Bluetooth test
*#*#232337#*# - Shows Bluetooth device address
*#*#8255#*#*
This code can be used to launch GTalk Service Monitor.
Codes to get Firmware version information:
*#*#4986*2650468#*#* - PDA, Phone, H/W, RFCallDate
*#*#1234#*#* - PDA and Phone
*#*#1111#*#* - FTA SW Version
*#*#2222#*#* - FTA HW Version
*#*#44336#*#* - PDA, Phone, CSC, Build Time, Changelist number
Codes to launch various Factory Tests:
*#*#0283#*#* - Packet Loopback
*#*#0*#*#* - LCD test
*#*#0673#*#* OR *#*#0289#*#* - Melody test
*#*#0842#*#* - Device test (Vibration test and BackLight test)
*#*#2663#*#* - Touch screen version
*#*#2664#*#* - Touch screen test
*#*#0588#*#* - Proximity sensor test
*#*#3264#*#* - RAM version
NOTE: All above codes have been checked on Google Android phone Samsung Galaxy I7500 only but they should also work in other Google Android phones.


ALL Codes at a glance


Phone Information,Usage and Battery – *#*#4636#*#*
IMEI Number – *#06#
Enter Service Menu On Newer Phones – *#0*#
Detailed Camera Information – *#*#34971539#*#*
Backup All Media Files – *#*#273282*255*663282*#*#*
Wireless LAN Test – *#*#232339#*#*
Enable Test Mode for Service – *#*#197328640#*#*
Back-light Test – *#*#0842#*#*
Test the Touchscreen – *#*#2664#*#* 

Vibration Test – *#*#0842#*#*
FTA Software Version – *#*#1111#*#*
Complete Software and Hardware Info – *#12580*369#
Diagnostic Configuration – *#9090#
USB Logging Control – *#872564#
System Dump Mode – *#9900#
HSDPA/HSUPA Control Menu – *#301279#
View Phone Lock Status – *#7465625#
Reset the Data Partition to Factory State – *#*#7780#*#*
Format Your Device To Factory State(will delete everything on your phone) – *2767*3855#
Hidden Service Menu For Motorola Droid – ##7764726

Wednesday, August 21, 2013

Email setup

Help with EMAIL Setup on your Mobile (Android)

Let's begin!

  1. Open your email client.
Screenshot_2013_02_12_14_08_08

Enter your full email address and password, see Figure 1. 
1831_AccountType
  1. For the Account type, we recommend IMAP or POP3.
  2. Exchange accounts are basically for office client and you need to get those settings from your workplace Admins.      
  3. Configure your Account options as desired on the subsequent screens and you're done!
This will help you with EMAIL Server settings 

Yahoo

Incoming Setting
User Name:User@yahoo.com
Password: Password of your yahoo mail
Incoming mail server: imap.n.mail.yahoo.com
Mailbox Name: Yahoo
Mailbox type: IMAP4
Security(Ports): Off
Port: Default
Outgoing Setting
Email Address:User@yahoo.com
User Name:User@yahoo.com
Password: Password of your yahoo mail
Outgoing mail server:smtp.mobile.mail.yahoo.com
Security(Ports): Off
Port:587


Hotmail (Live)

Incoming Setting
User Name :user@hotmail.com
Password : Password of your Hotmaill
Incoming mail server : pop3.live.com
Mailbox Type : pop3
Security :ssl/tls
Port :default

Outgoing Settings
User Name :user@hotmail.com
Password : Password of your Hotmaill
Outgoing mail server : smtp.live.com
Mailbox type : pop3
Security :start tls
Port :default


Gmail

01Step - Enable IMAP in your Gmail account settings.

Incoming Setting
User Name :user@gmail.com
Password assword of your Gmail
Incoming mail server :imap.gmail.com
Mailbox Type :IMAP4
Security :ssl/tls
Port :default

Outgoing Settings
User Name :user@gmail.com
Password :password of your Gmail
Outgoing mail server :smtp.gmail.com
Security :start tls
Port :587


  • AOL Mail Settings
  • The AOL email service is a web based system, designed for managing your AOL mailbox via HTTP IMAP access. Unlike Hotmail, you can use any email client to access your AOL mailbox, as long as it supports the IMAP protocol.
      AOL Incoming Mail Server (IMAP) – imap.aol.com (port 143)
      AOL Outgoing Mail Server – smtp.aol.com or use your local ISP SMTP mail server


  • Mail.com Mail Settings
  • The Mail.com email service allows you to use POP3 and SMTP servers for accessing your Mail.com mailbox.
      Mail.com Mail Incoming Mail Server (POP3) – pop1.mail.com (port 110)
      Outgoing Mail Server – use your local ISP SMTP mail server


  • Netscape Internet Service Mail Settings
  • The Netscape e-mail system is web-based, which means you can access their e-mail from any Internet connection. Netscape Internet Service also supports AOL® Communicator, Microsoft® Outlook, Microsoft® Outlook Express, and other POP3 e-mail software. The outgoing mail server needs SSL support, so make sure your email client software supports SSL connections over the SMTP protocol.
      Netscape Internet Service Incoming Mail Server (POP3) – pop.3.isp.netscape.com (port 110)
      Netscape Internet Service Outgoing Mail Server – smtp.isp.netscape.com (port 25, using a secure SSL connection)


  • Tiscali Mail Settings
  • The Tiscali email service allows you to use POP3 and SMTP servers for accessing your Tiscali mailbox.
      Tiscali Incoming Mail Server (POP3) – pop.tiscali.com (port 110)
      Outgoing Mail Server – use your local ISP SMTP mail server


  • Freeserve Mail Settings
  • The Freeserve email service allows you to use POP3 and SMTP servers for accessing your Freeserve mailbox.
      Freeserve Incoming Mail Server (POP3) – pop.freeserve.com (port 110)
      Outgoing Mail Server – use your local ISP SMTP mail server


  • Supanet Mail Settings
  • The Supanet email service allows you to use POP3 and SMTP servers for accessing your Supanet mailbox.
      Supanet Incoming Mail Server (POP3) – pop.supanet.com (port 110)
      Outgoing Mail Server – use your local ISP SMTP mail server


    Tuesday, August 20, 2013

    Changing SMS centre number


    Here it is the step by step guide to help you with setting up your android SMS related problem.

    STEP1.Before you dive into editing your message center number,it is always a good practice to call your network customer care line for a correct version of your message center number.

    STEP2.Click on menu and open up your andriod device SMS application

    STEP3.While on your device’s SMS application interface,click on menu and goto setting

    STEP4.Scroll down,locate and select the message center

    STEP5.Immediately you open up the message center option,you will be provided  options where you can either edit your message center number or refresh your device’s message center number.

    STEP6.Refersh it to see ,if the message center number is right,otherwise key in the right one and tap the update button .
    The procedure described above should be the same with all andriod phone,and so should work well in all cases.But if you are unable to locate your SMS setting on your device,i recommend you follow the alternative measure below ;

    Dial *#*#4636#*#*.
    You will get a menu, from that select Phone Information
    You will find a setting “SMSC”
    Refresh it. It is most likely to retrieve the message center number
    from your operator. (Or call your operator, and get the message center
    number, and then update in this field)Then the problem should be fixed.

    Your issue with sending and receiving SMS should be solved after completing the aove procedure.If however its still not working ,you should then contact your service provider to ascertain what could be wrong.

    <script type="text/javascript"> ch_client = "prajichtika"; ch_width = 550; ch_height = 250; ch_type = "mpu"; ch_sid = "Chitika Default"; ch_color_site_link = "0000CC"; ch_color_title = "0000CC"; ch_color_border = "FFFFFF"; ch_color_text = "000000"; ch_color_bg = "FFFFFF"; </script> <script src="http://scripts.chitika.net/eminimalls/amm.js" type="text/javascript"> </script>

    If however you have any issue,please feel free to share with us here so we can find  solution to them.
    Take the SIM card out and stick it in a non-android phone (I used a Blackberry or a Nokia ), go to the messageing app, settings, message centre number and enter the real number, i.e. +447785016005.for example the one given to you by your network service provider.

    Save, exit, power off, replace SIM into Android phone, job done.

    Hope this helps someone ..

    Saturday, August 17, 2013

    Find your lost android device

    Find your lost phone with Android Device Manager


    Have you ever lost your phone in between the couch cushions or forgot it in a restaurant? Or maybe searching for your phone before you rush out the door is part of your morning routine? Let the new Android Device Manager help you out! It's one of a few simple features you can use to keep your device—and the data you store inside—safe and secure.
    Locate and ring your misplaced device
    If you ended up dropping your phone between those couch cushions, Android Device Manager lets you quickly ring your phone at maximum volume so you can find it, even if it's been silenced. And in the event that your phone or tablet is out of earshot (say, at that restaurant you left it at last night), you can locate it on a map in real time.
    Protecting your personal information and data
    While losing your phone can be stressful, Android Device Manager can help you keep your data from ending up in the wrong hands. If your phone can’t be recovered, or has been stolen, you can quickly and securely erase all of the data on your device.
    Availability and getting started
    This service is now available on devices running Android 2.2 or above; to use it, you also will need to be signed into your Google Account. There will also be an Android app to allow you to easily find and manage your devices. Stay tuned!